Jeff Smith has an excellent article on how to enable OCI Thick Client connections in SQL Developer, and all the reasons you might want to. For me, it all comes down to the ability to cancel a running query or process in a timely manner. The “hang” normally associated with canceling JDBC-based thin client connections is pretty unacceptable. With thick client you get the same level of responsiveness as you would in a console SQL*Plus session.
If you want to set up thick client connections, you’ll need to download the Oracle Instant Client and follow the instructions in Jeff’s blog to configure SQL Developer to use the Instant Client OCI libraries. However, there are a couple of extra steps only hinted at in the comments of the blog that are necessary to get everything working properly. I thought I’d just spell it out here for anyone still confused.
Add the following line to sqldeveloper.conf
Link to heading
In the directory where you installed SQL Developer, navigate to sqldeveloper\bin and edit the file sqldeveloper.conf. Add this line to the bottom of the file.
AddVMOption -Djava.library.path=C:\path\to\oracle\instantclient
Even though you’ve already configured the path to the Instant Client home directory in SQL Developer’s Preferences if you’ve followed all the instructions in Jeff’s blog, you still have to add this line to the config file or SQL Developer will not be able to find the OCI libraries. Go figure.
Add the Instant Client installation directory to the Windows %PATH% Link to heading

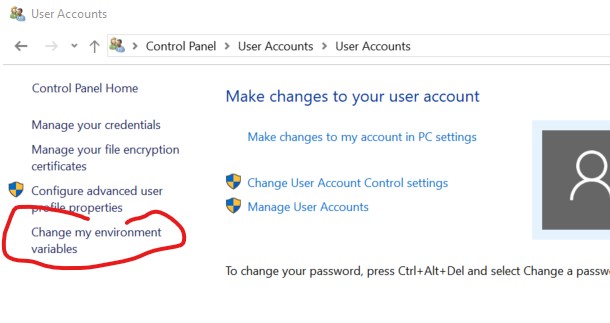
Go to the User Accounts control panel and click on “Change my environment variables.”

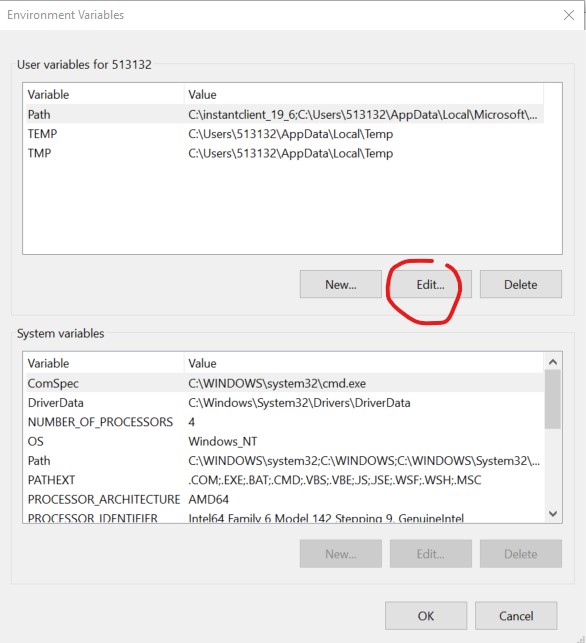
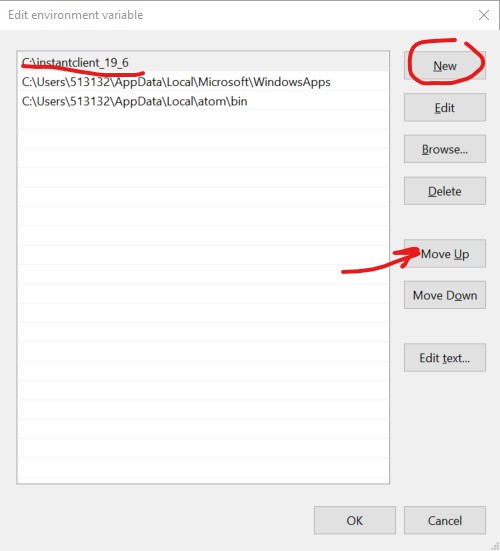
Edit the %PATH% environment variable and add an entry for the directory where you installed Oracle Instant Client.

It needs to be first in the list, so if necessary move the entry to the top.
After restarting SQL Developer, click Help from the menu and select About. From the Properties tab, search for OCI. The value should now show as “true.”