Connect to Autonomous Database in the Cloud with Oracle Instant Client
The easiest and fastest way to query and create data in your new cloud database is with SQL Developer Web, provided free with every new instance of Autonomous Database and Autonomous Data Warehouse in the Cloud. Second fastest would be with a local installation of SQL Developer or SQLcl. But if you want an authentic SQL*Plus environment, then you’ll need Oracle Instant Client.
You have two options for running SQL*Plus under Instant Client: download and install a platform-native version, or else run Instant Client in a Docker container. Your database Service Console has instructions and download links for whichever approach you choose.
Download and Install Instant Client
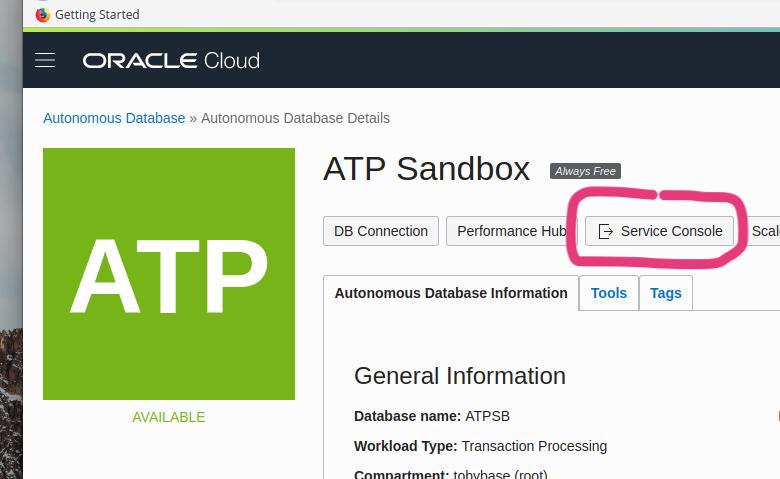
Navigate to the Details page for your Autonomous Database, and click on Service Console.
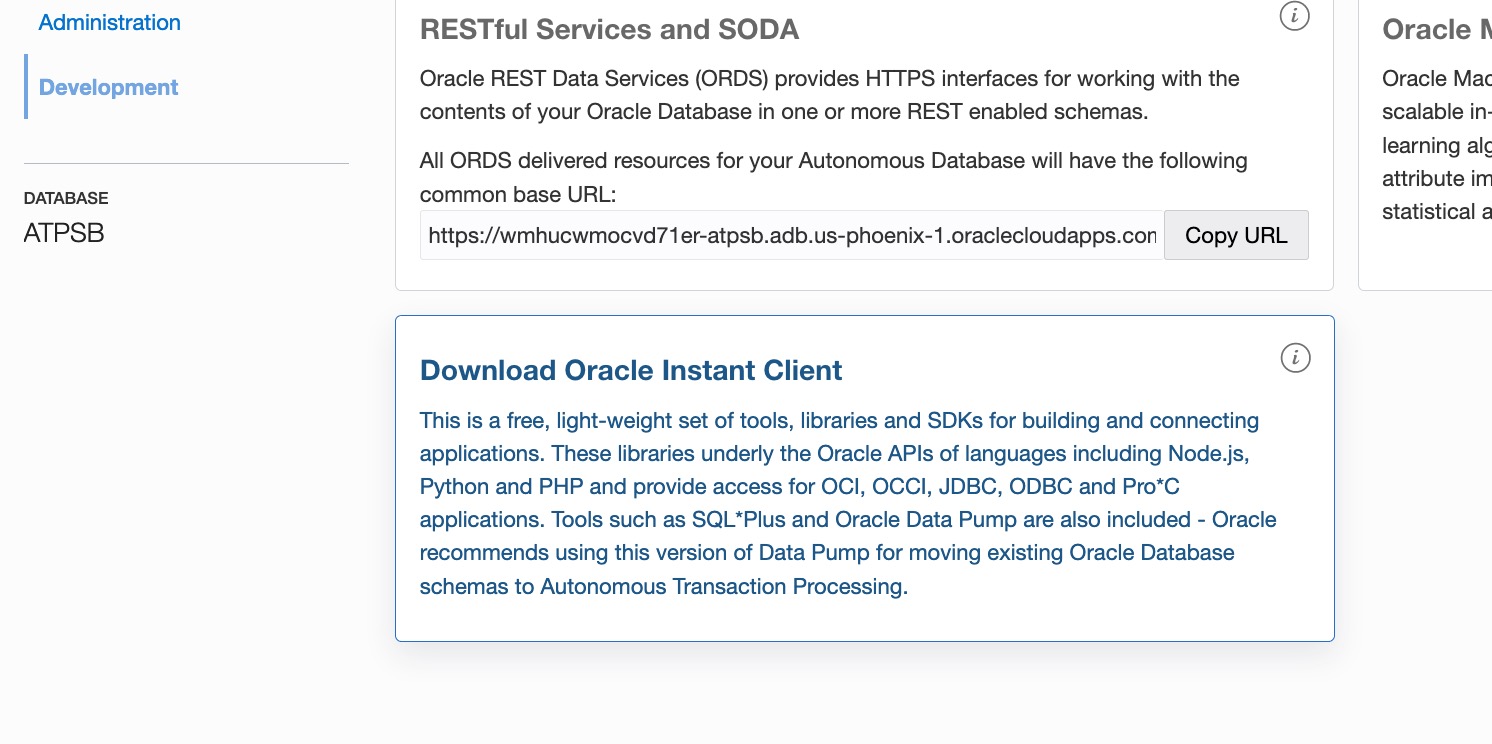
Click on Development, then click on Download Oracle Instant Client.
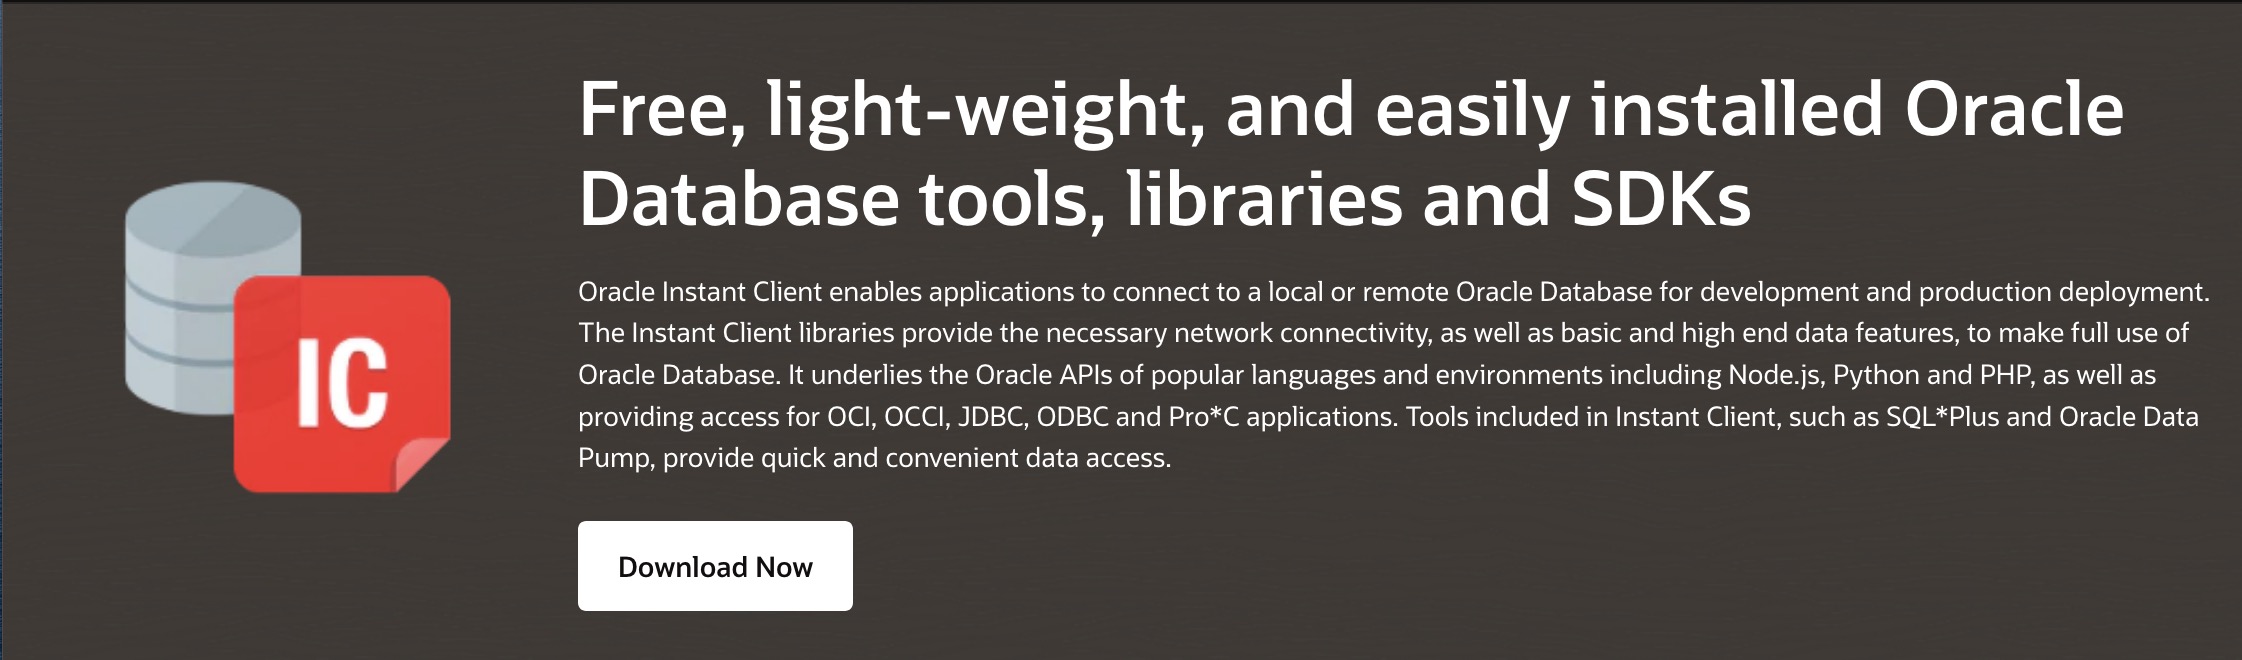
Click Download Now to get to the downloads page, and select a suitable installer. Download Instant Client and follow the simple installation instructions, which will be some variant of the following:
- Download the appropriate Instant Client packages for your platform. All installations REQUIRE the Basic package.
- Unzip the packages into a single directory such as “instantclient”.
- Set the library loading path in your environment to the directory in Step 2 (i.e., “instantclient”). On MacOS, DYLD_LIBRARY_PATH is the appropriate environment variable.
- Set the executable path in your environment to the directory in Step 2 (i.e., “instantclient”). On most systems, PATH is the appropriate variable.
Run Instant Client in a Docker Container
While Oracle Instant Client is available for most all major platforms, you may find it advantageous to run it in a Docker container; for instance, if you need the ability to run multiple versions for testing purposes, or if you want to integrate Instant Client installations into a CI/CD build and deploy workflow.
I’ll skip the steps for installing Docker on this blog. You can find instructions on the Docker website or here. For those unfamiliar with Docker or container technologies, you can think of containers as a lighter-weight version of virtual machines; whereas a virtual machine attempts to emulate hardware in software, a container seeks to emulate only the O/S or application service layer needed by a specific applicatoin. As a result, containers use far less memory and CPU than software running in virtual machines.
Oracle provides ready-made containers for the 12c Instant Client on both Docker Hub and its own Oracle Container Registry. If you want to run the latest 19c version, you’ll need to download the Dockerfiles (the build script for the Docker image) from Oracle’s Github repository and build the container yourself.
Pull the Instant Client 12c Container From Docker Hub
You can find Instant Client on the Docker Hub under Oracle’s Publisher Page. Click the Proceed to Download button. You’ll need to sign in or create a (free) account with Docker, and then accept Oracle’s licensing terms to get the download instructions.
To pull the container from Docker Hub, run the following.
$ docker login
If prompted, provide your Docker Hub credentials.
$ docker pull store/oracle/database-instantclient:12.2.0.1
You can now run SQL*Plus with something like the following command.
$ docker run -ti --rm database-instantclient:12.2.0.1 sqlplus admin/password@example.com/pdborcl
Pull the Instant Client 12c Container From the Oracle Container Registry
Another option would be to pull the container directly from Oracle. However, the ready-made container that Oracle provides is no more recent than the one available from Docker.
Navigate to the Oracle Container Registry and click on Database. Then click on “instantclient.”
As with Docker Hub, you’ll need to sign in or create a (free) Oracle account before you can pull the container.
$ docker login container-registry.oracle.com
Enter your Oracle credentials. Then pull the container with the following command.
$ docker pull container-registry.oracle.com/database/instantclient:latest
You can now run SQL*Plus with something like the following command.
$ docker run -ti --rm instantclient:latest sqlplus admin/password@example.com/pdborcl
Build Instant Client 19c From Dockerfiles on Oracle’s Github Repo
This option involves a couple of extra steps, but it will definitely allow you to run the latest version of the Instant Client software. For whatever reason, Oracle seems to keep their Github repo more current than their container registry.
Navigate to the Oracle Github Repository and click on “docker-images”. Click on the green “clone or download” button.
If you have git and wish to clone the repository, run the following command.
$ git clone https://github.com/oracle/docker-images.git
Or else just download and extract the ZIP file to a suitable directory.
Navigate to “OracleInstantClient” and view the README file. It has instructions for building the container image.
Change directory to dockerfiles/19 and run:
docker build --pull -t oracle/instantclient:19 .
You do not need to download any Instant Client installation files as the build process automatically downloads them from Oracle’s yum server.
Connect to Autonomous Database in the Cloud With SQL*Plus

Navigate to the Details screen for your Autonomous Database or Autonomous Data Warehouse. Click on DB Connection.
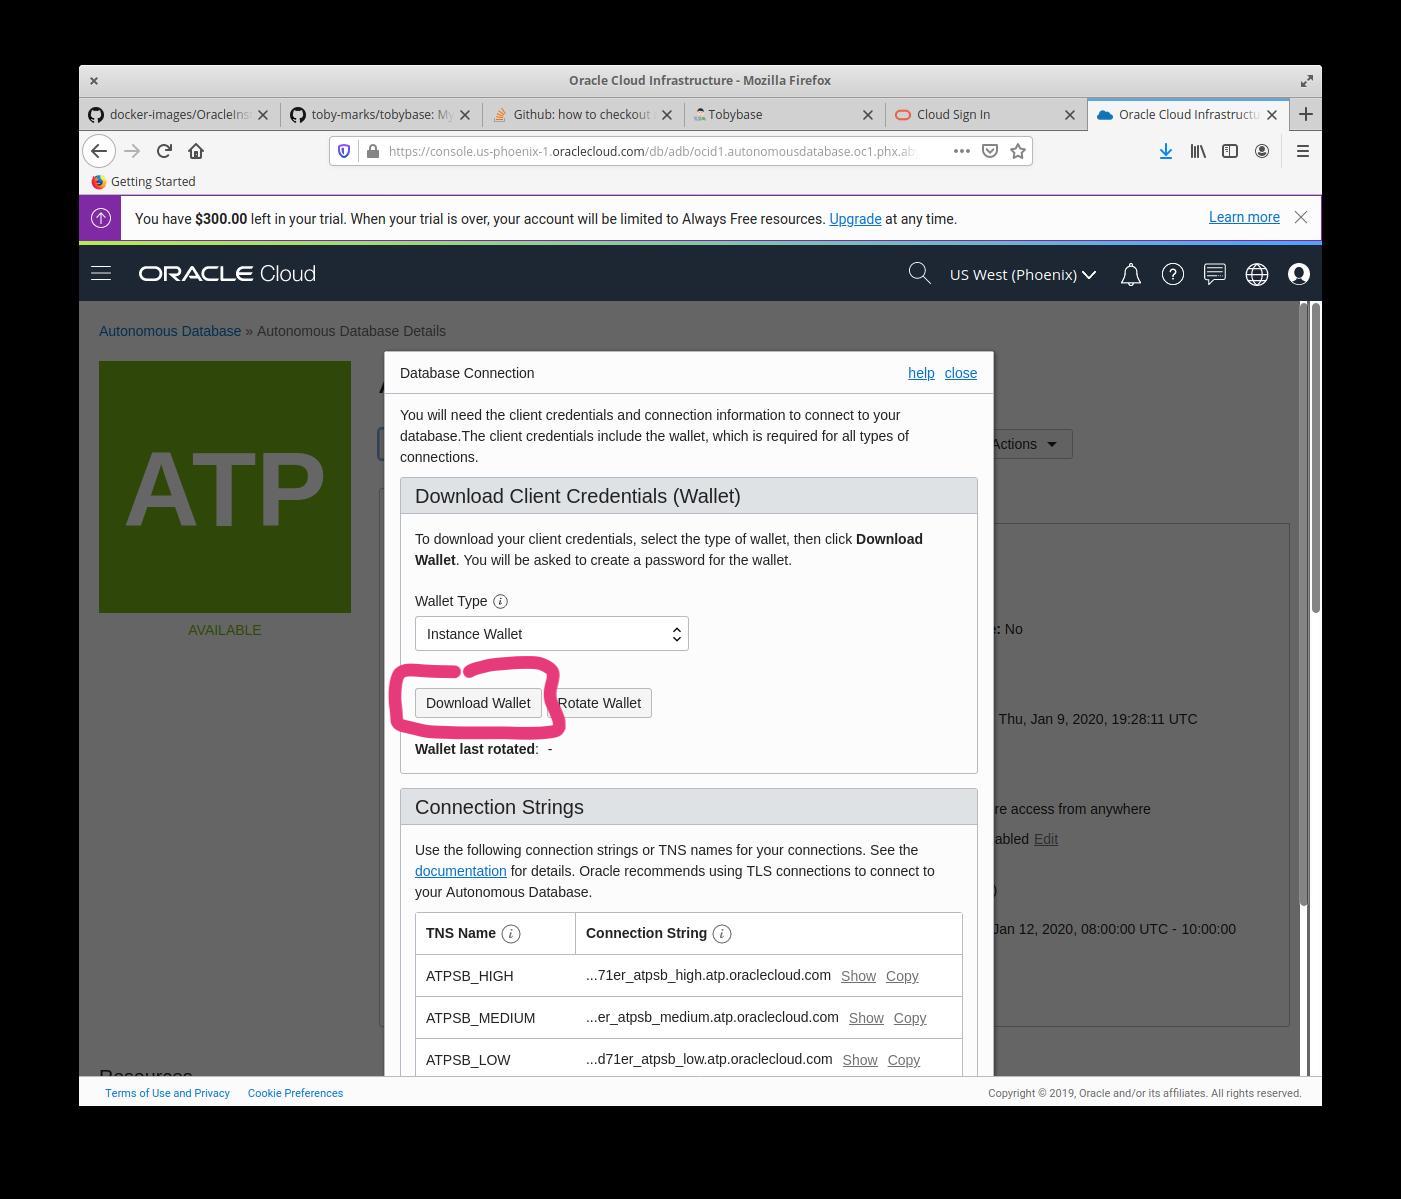
Click on Download Wallet. Extract the contents of the wallet file (the ZIP file you just downloaded), and place them in your TNS_ADMIN diretory. If you don’t have a TNS_ADMIN directory, create an environmental parameter TNS_ADMIN and point to the directory where the expanded contents of the wallet are located. (See my other post for more on the contents of the wallet file.)
When you run SQL*Plus in a container, you’ll want to map your local TNS_ADMIN directory to the container, so that the container sees the TNS connection info for your database and uses the appropriate wallet file to establish an encrypted connection. Fortunately, this is fairly easy. You can use the -v flag with Docker’s run command to map a local file to the container.
When you map a local directory to a directory on a container, the contents of that directory get “overwritten” — overlapped might be a better way to think about it — by the contents of the local directory at runtime. You’ll need the location of the TNS_ADMIN directory on the container, which thankfully is noted in the README file in the “OracleInstantClient” directory.
/usr/lib/oracle/19.5/client64/lib/network/admin
So to properly connect to Autonomous Database in the Cloud from SQL*Plus in a Docker container, you’ll need to run something like the following command.
NOTE: Scroll the region below to the right to see the whole command.
$ docker run -it --rm -v /path/to/local/TNS_ADMIN/directory:/usr/lib/oracle/19.5/client64/lib/network/admin oracle/instantclient:19 sqlplus admin@myclouddb_high
To make that a little quicker to invoke, you can stick an alias in your SHELL profile script like so.
#
# Shell Aliases
#
alias sql2cloud='docker run -it --rm -v /path/to/local/TNS_ADMIN/directory:/usr/lib/oracle/19.5/client64/lib/network/admin oracle/instantclient:19 sqlplus admin@myclouddb_high'
Then the next time you login you can just run the following at the prompt to connect to Autonomous Database.
$ sql2cloud
In conclusion, it’s really quick and simple to launch a free instance of Oracle Autonomous Database or Data Warehouse in the Cloud. But connecting to and using your new database might leave a few folks scratching their heads. I hope you found this series of articles helpful in bridging that gap and getting you going with your development tool of choice.
Now get to work!